


There will be more pictures coming after the clear-coat dries.
Also not pictured is a cool old-school syphon touch-up gun I used to put down the DuPont Centauri Urethane Clear-Coat.


Butane Flames - Motorcycle Tank & Fenders
OK - here we go. My first attempt at painting Tru-Fire style flames, except using the Butane method, on something other than a poorly done first-attempt on a junker computer case.
The following is the series of things I'm doing in figuring out how to do 'Butane Tru-Fire' flames with an airbrush. The paints I'm using to do this are from House of Kolor, and they're the 4oz. pre-reduced Airbrush mix of each color. The camera's not really doing the colors justice - but isn't that always the case?
The colors are: Black, White, Marine Blue, So-Blue, Cobalt Blue (candy), Oriental Blue (candy), and a blend of White and So-Blue for the highlights.
|
|
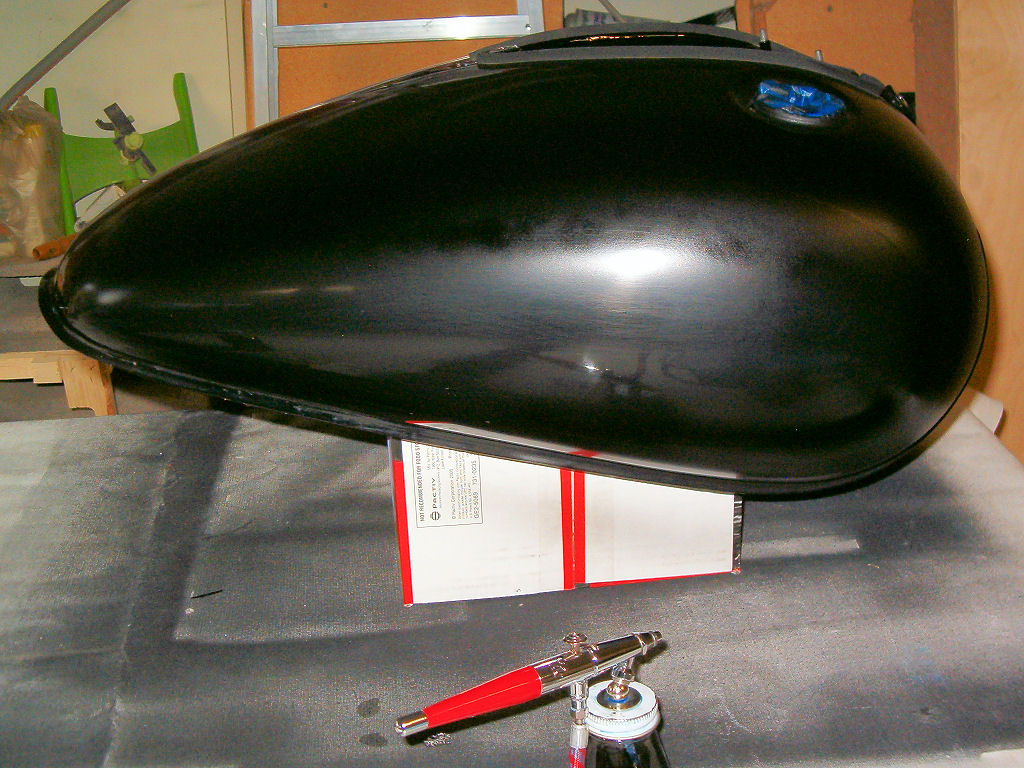
We start out with an unsuspecting Yamaha V-Star tank. I've scuffed the clear coat (basically ruined the shiny-ness) so the new paint can have something to 'bite' into. The stripes were installed at the factory and the clear coat painted on over them to make sure any gas spilled won't mess up the graphics. Nice touch - but not if you want to repaint your stuff. I decided to leave them on and black them out - to preserve the goodness of the factory sealed paint. This way, I also don't mess up the surface with a bad base coat paint job, and after I clear coat it, it will be that much more impervious to gas spills. |
| |
This is after I 'erased' the stripes. They're only barely visible, in the way of a fine line of raised area. Once the rest of the color is laid down, it'll hardly be noticeable. |
| |
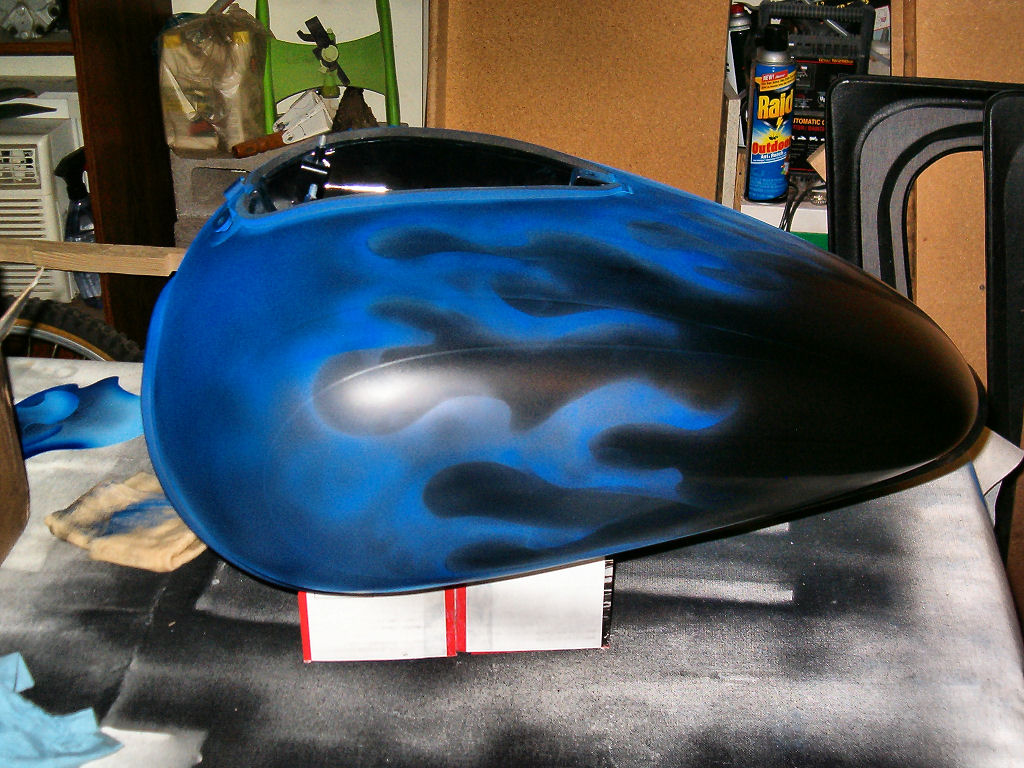
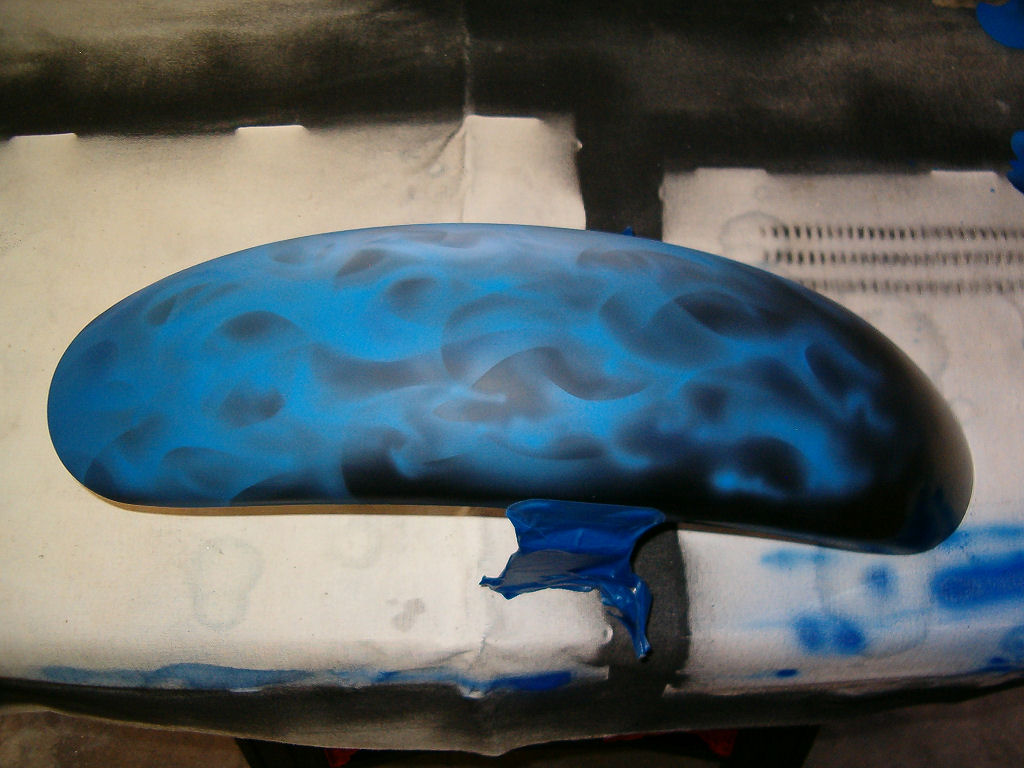
First 'layer' of flames - pre-Candy. I used Marine Blue this time - which even though it was hard to see against the black, laid down nicely for the 'background' flame licks. So far, so good. This took about an hour to lay out and put paint down, because it was getting dark, and I had to scramble to rig some lights in the garage. I also need to come up with something better for a tank perch - the Hefty box ain't cuttin' it. |
| |
And here's the other side - same layer. I haven't sprayed the Cobalt Blue (Candy) yet - I'm going to do that when I get the fenders ready for it as well. |
|
|
OK - after not being entirely enthusiastic about how the first layer went onto the tank (they look like hot-rod flames), I watched the Tru-Fire DVD again for inspiration. My stuff wasn't 'organic' enough - so I 'organicked' it a up a little. |
|
|
Other side. I didn't get pics of the front fender's first layer or the tweaking of the tank's first layer because of a hurried clean-up thanks to thunderstorms (can't have the wife's car with its new paint job caught outside with severe weather in the area...) |
|
|
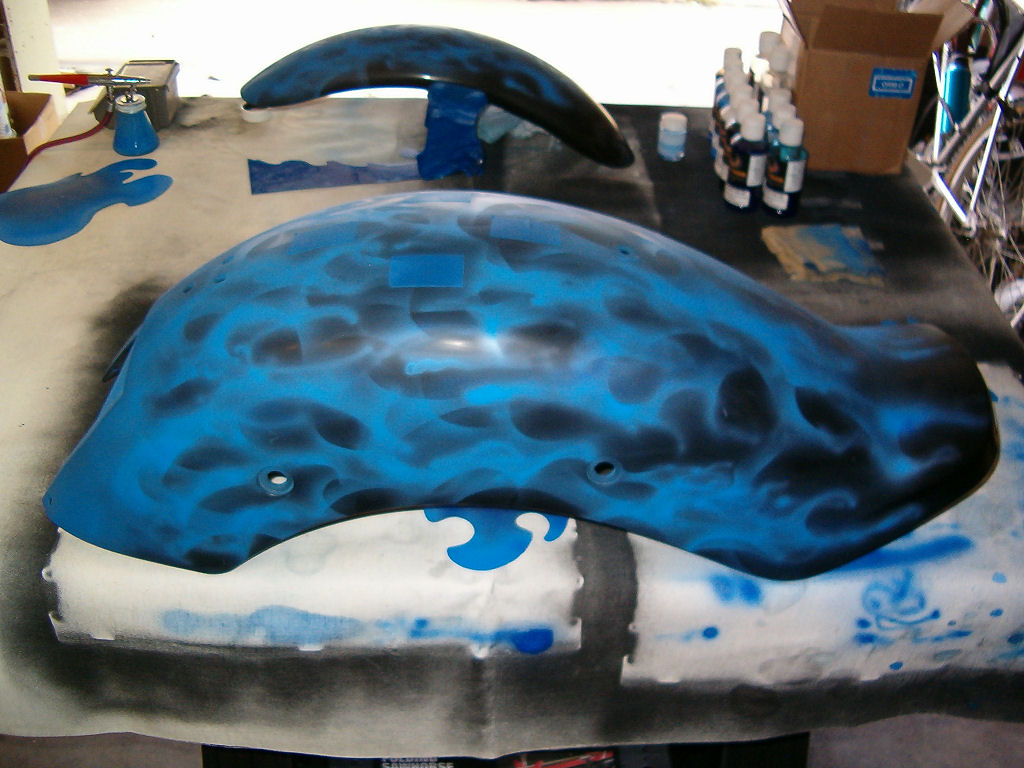
Here's the second layer of flames - using So-Blue. I tend to overdo it sometimes, which is why there's so much So-Blue flame licks on this. |
|
|
Other side - but I like how they went down. This fender's working out to be my favorite piece out of the bunch. |
|
|
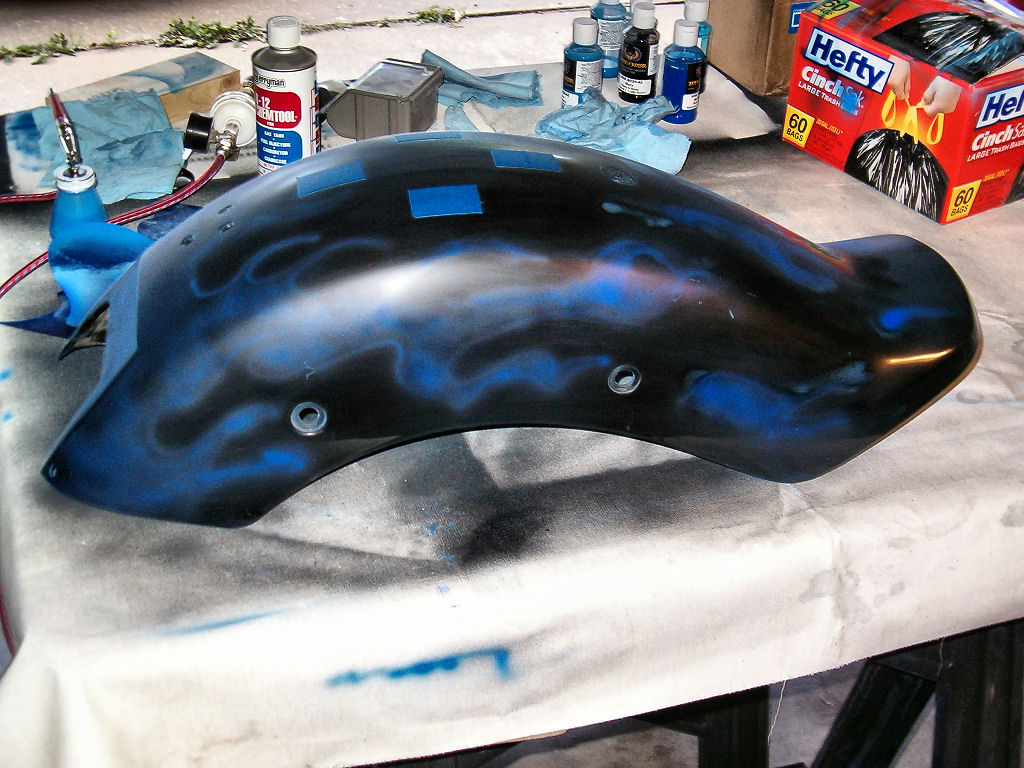
Rear fender. Not too bad - but I'm not as keen on this one as the front fender. |
|
|
Other side. Again - not too bad. |
| |
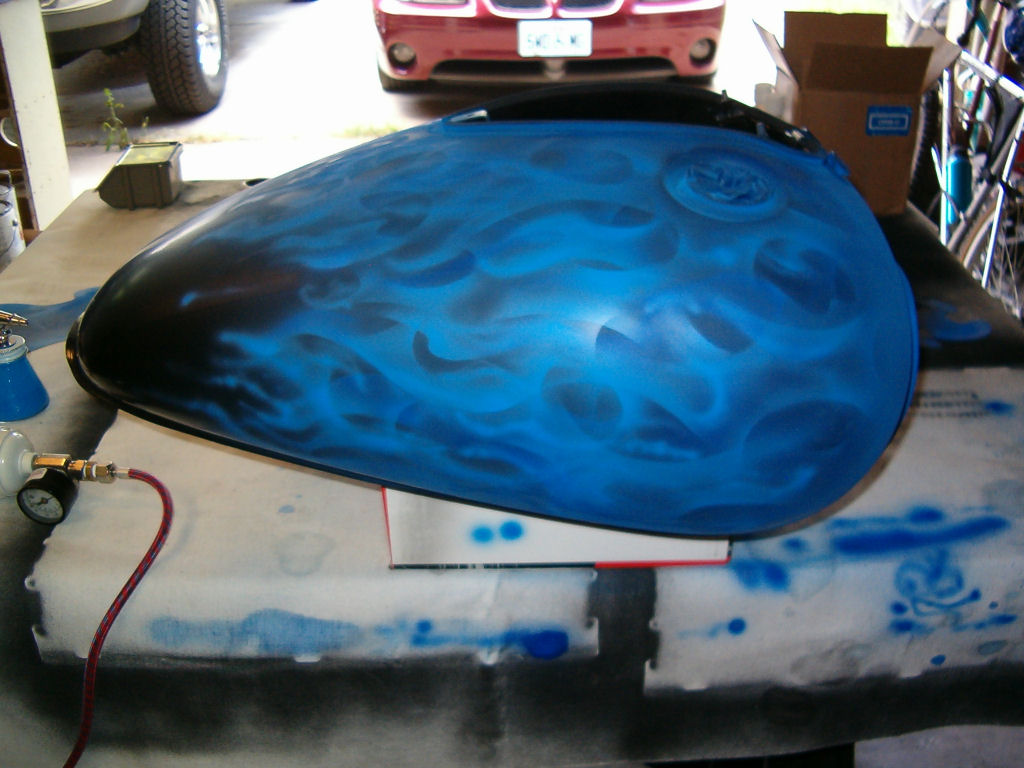
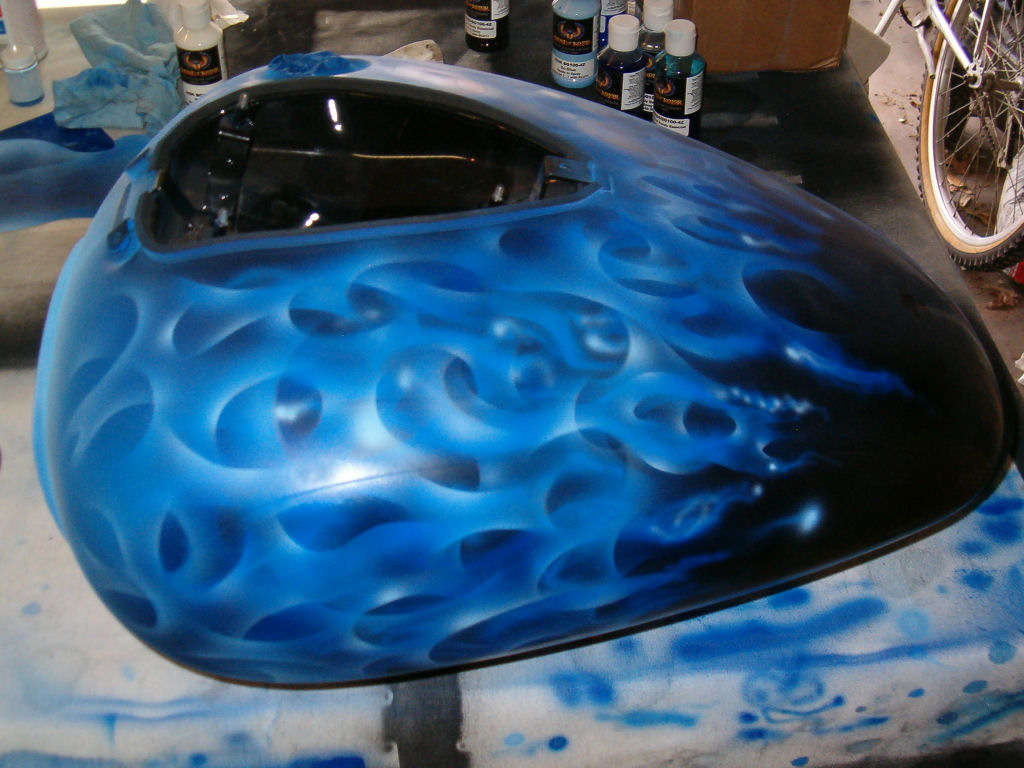
And here's the tank - after the tweaking of the first layer, I had more to build on. It's going OK - but I've got to come up with something better to stand the tank on. It's tough hitting the undersides. |
| |
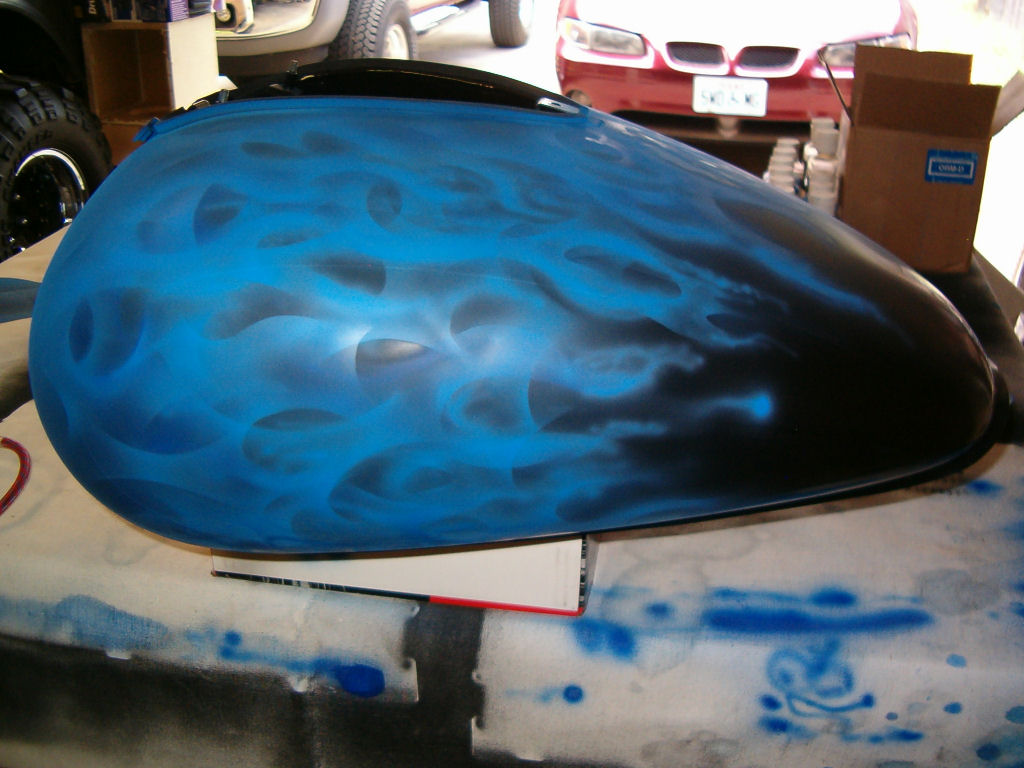
Here's the other side. Pretty much the same stuff. Looking OK so far. |
| |
And here's a different shot. Kinda wanted to see what it would look like from the rider's perspective. |
|
|
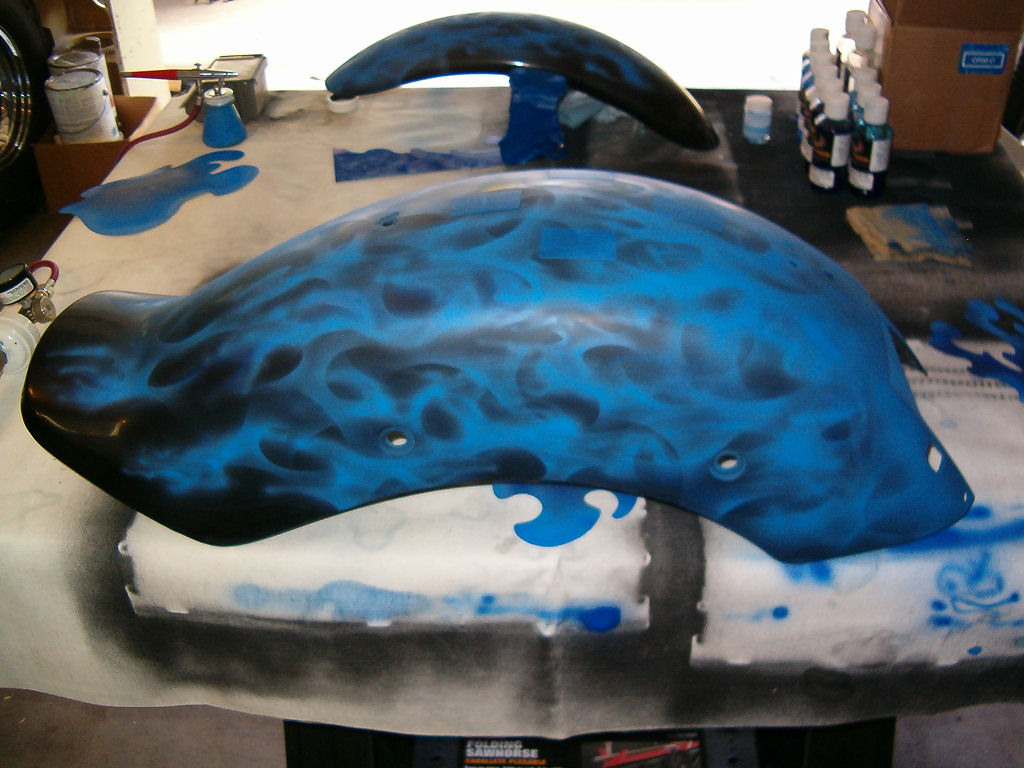
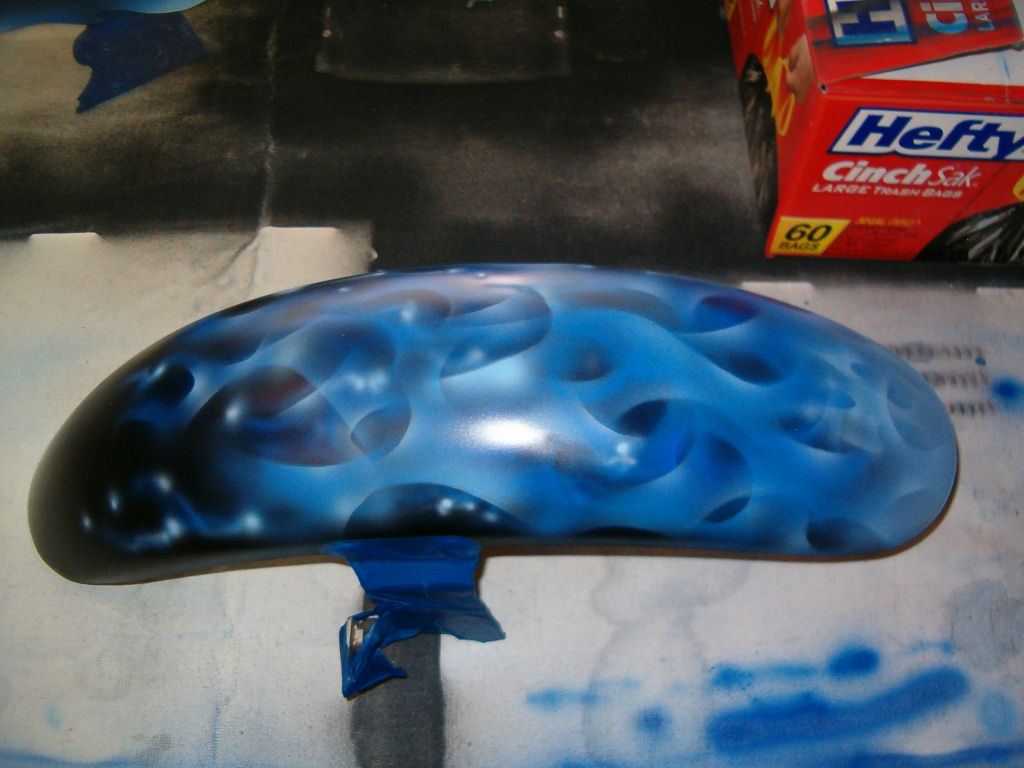
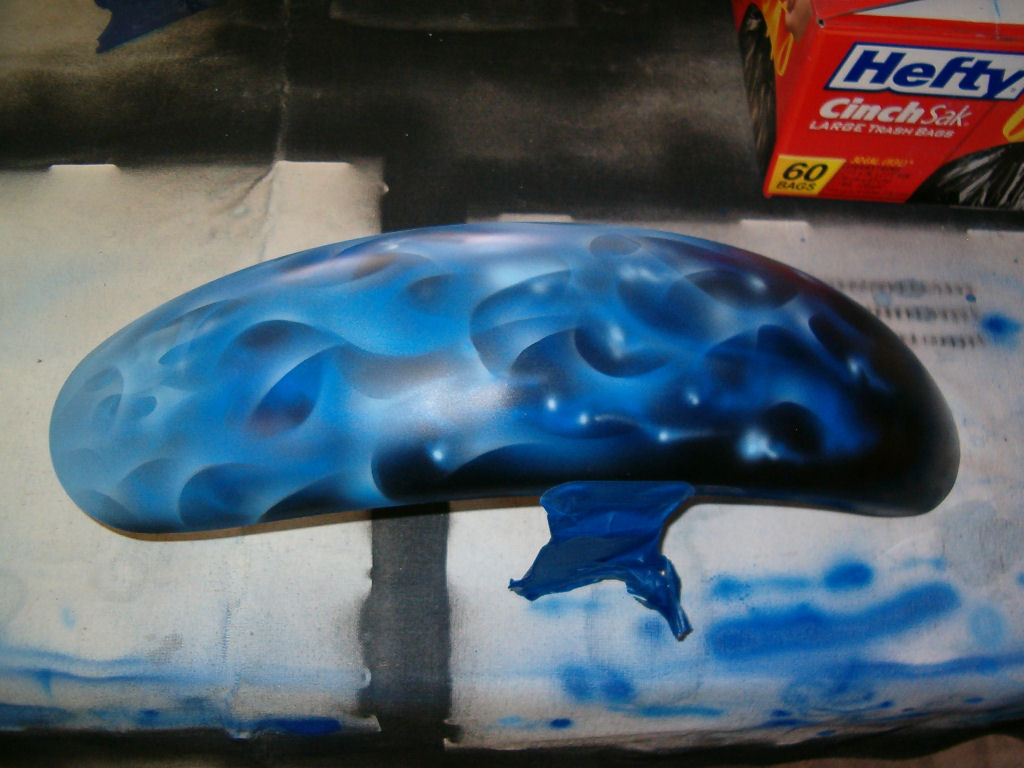
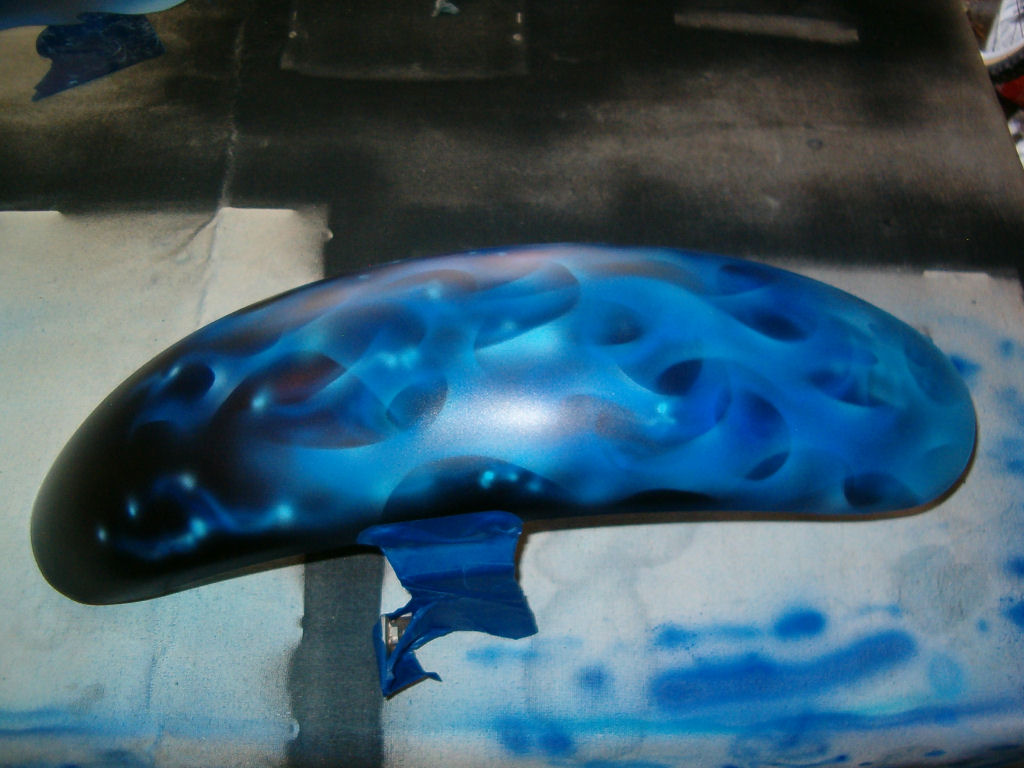
Alright - here's the front fender after the second layer of Cobalt Blue Candy and adding some highlights added to the flame licks - I forgot to take shots before adding the highlights. Some of those little dots are supposed to be flying embers... others were mistakes that I covered up by making them flying embers. (Kidding...) |
|
|
And the other side. I'm still diggin' this piece the most. |
|
|
This one's turning out better than I though it would. But I think it's got too many 'holes' in the fire. Oh well - kinda cool pattern anyway. |
|
|
Other side. More of the same - and I'm hoping that maybe the Oriental Blue Candy will knock back some of the bright spots. |
| |
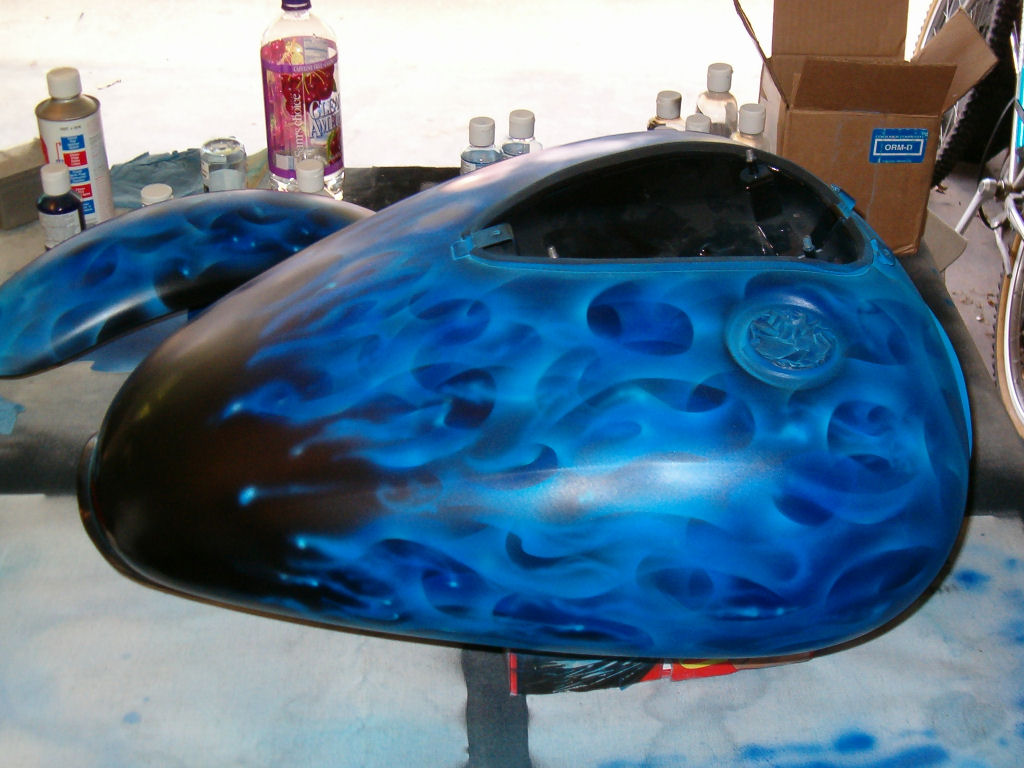
And here's the tank after adding highlights. |
| |
|
|
|
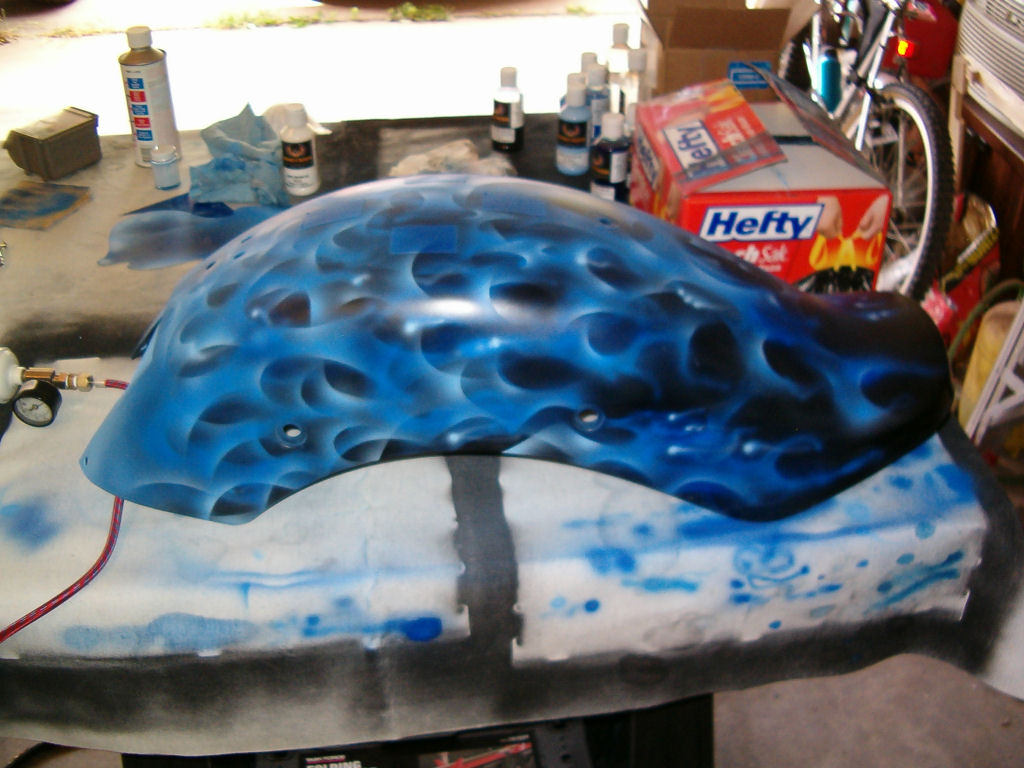
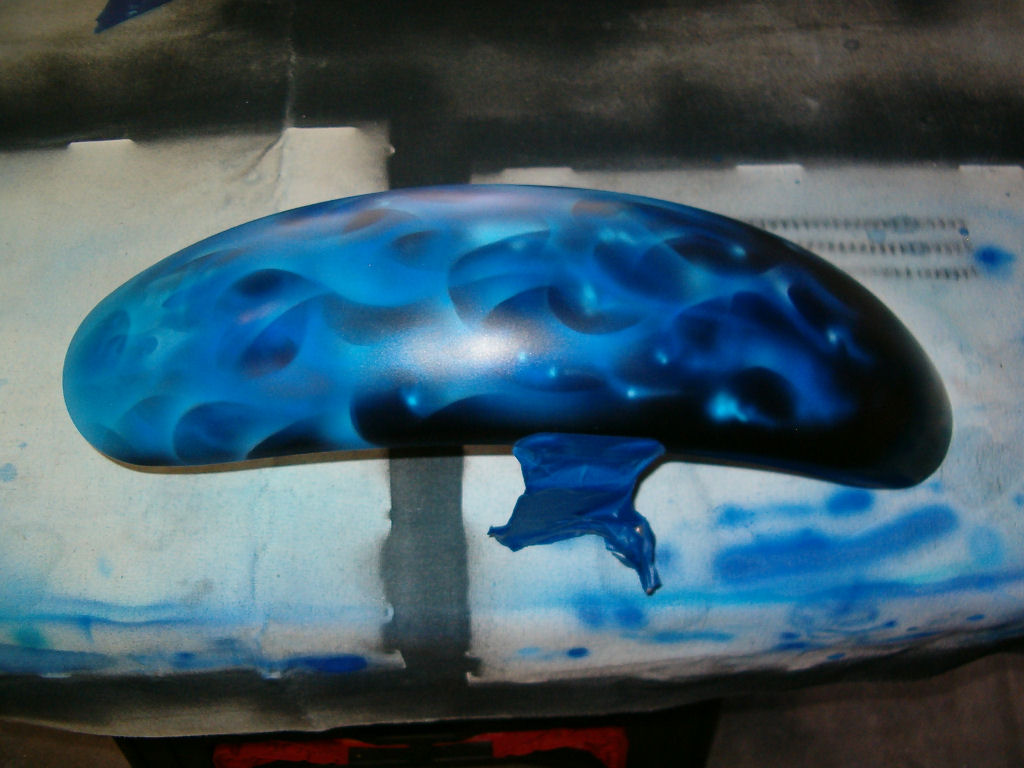
OK - here's the front fender after the Oriental Blue Candy - it knocked the brights down a bunch. Now I'm wondering if I should go hit them again... |
|
|
Other side - still wondering... Nah. |
|
|
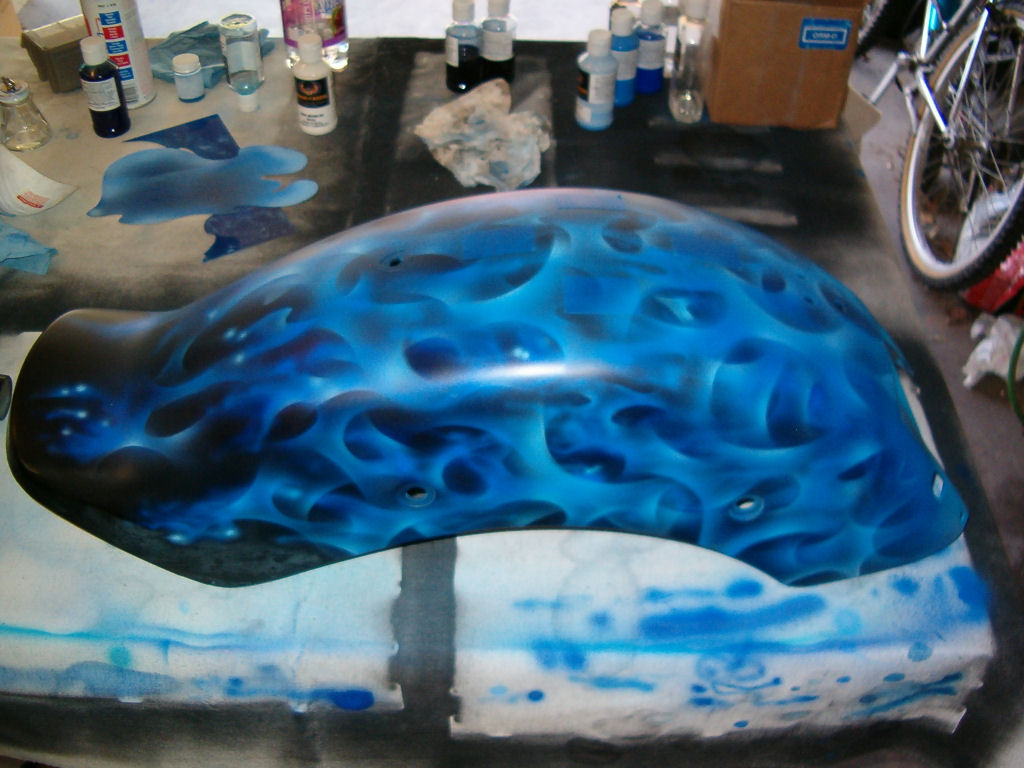
Rear fender. Looks like it helped... but I'm still not as happy with this one as I am with the front fender. |
|
|
Other side - and thinking 'Man, I am so glad this fender's going to be mostly covered up with saddle bags and the back seat.' |
| |
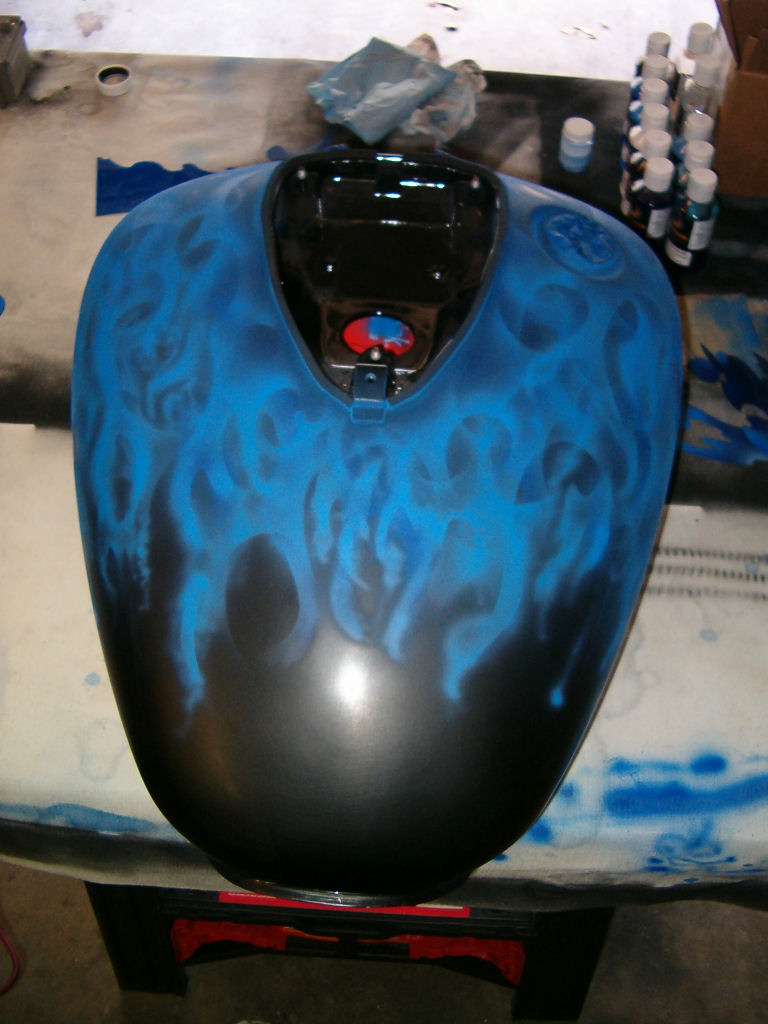
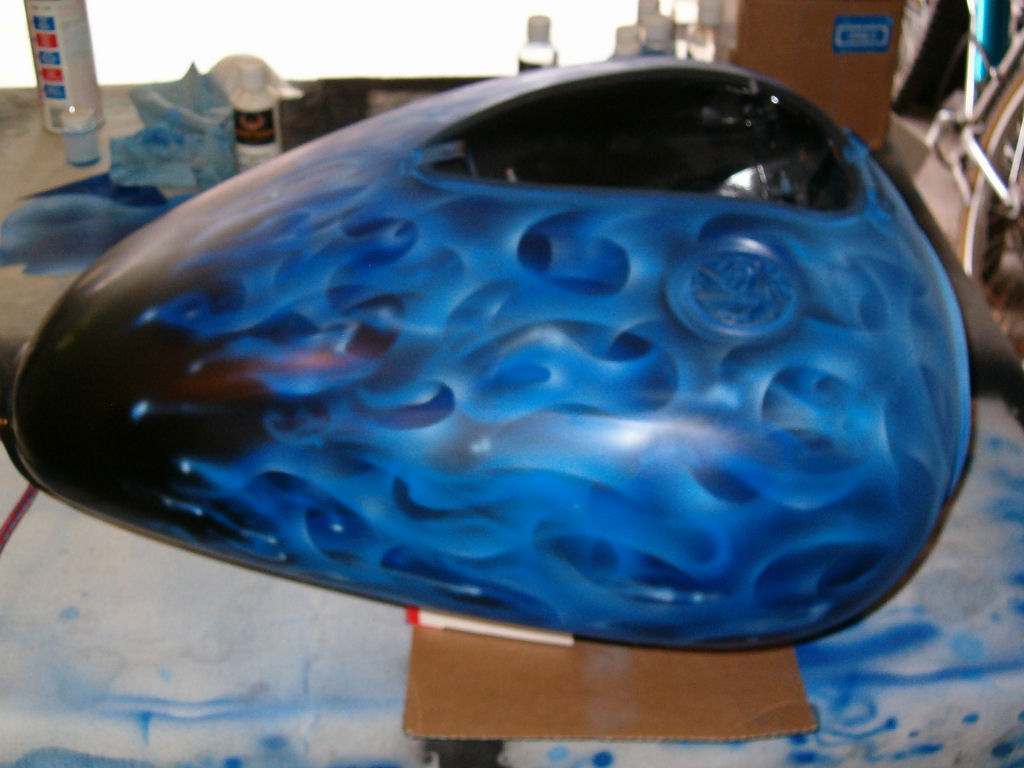
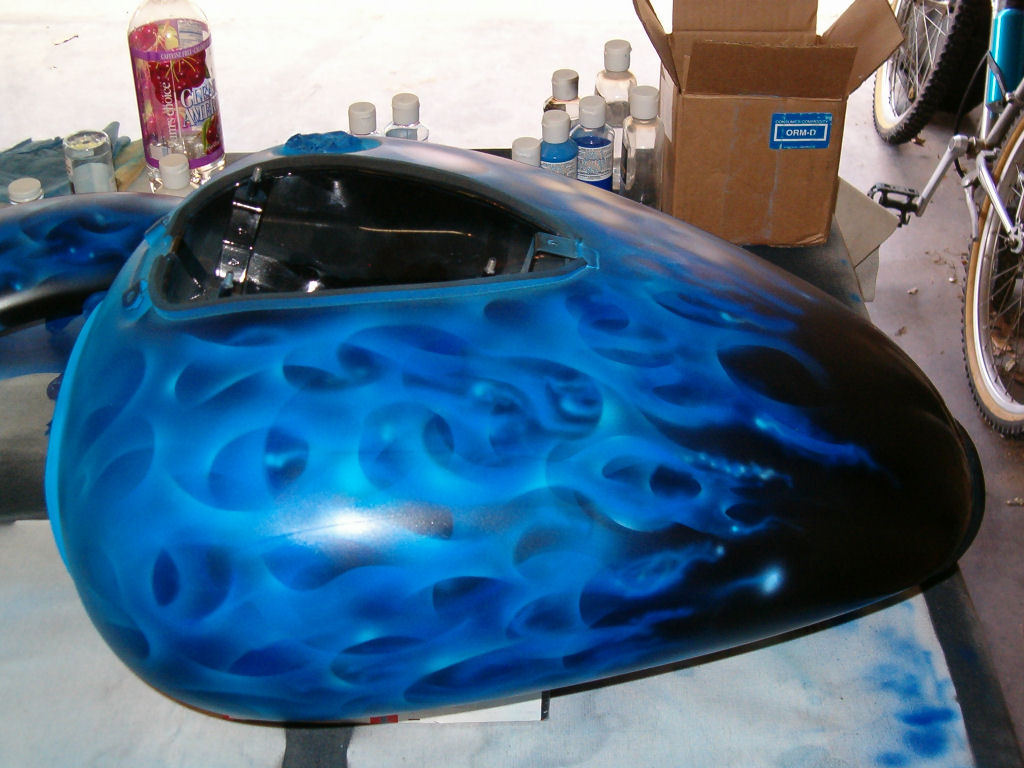
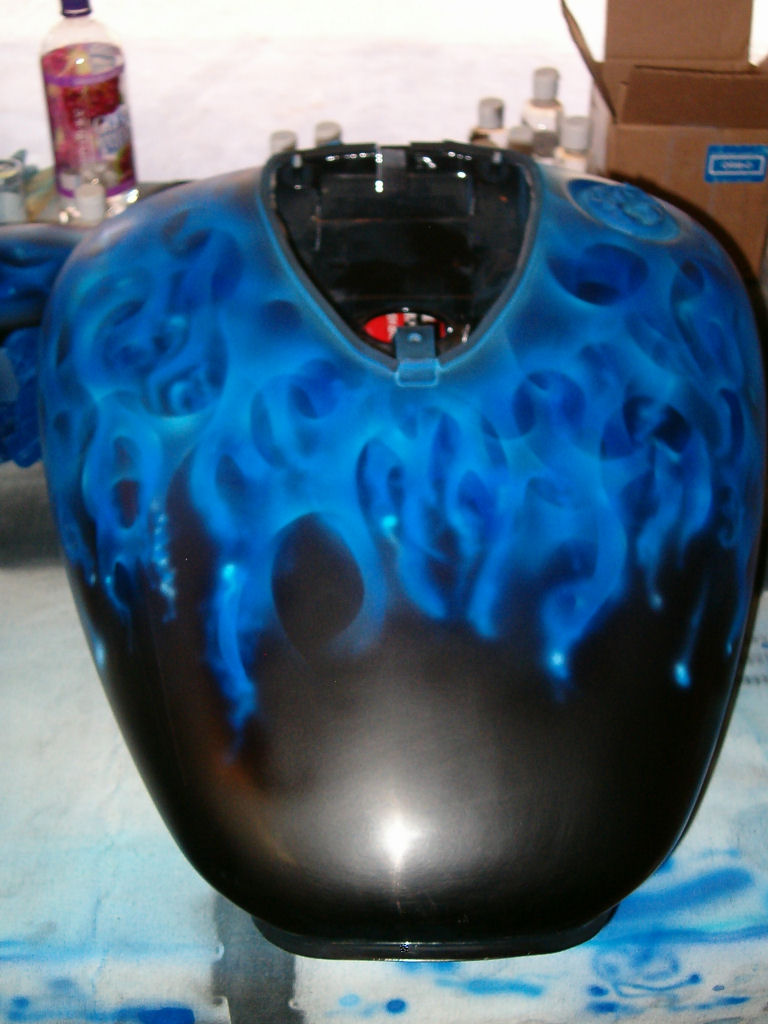
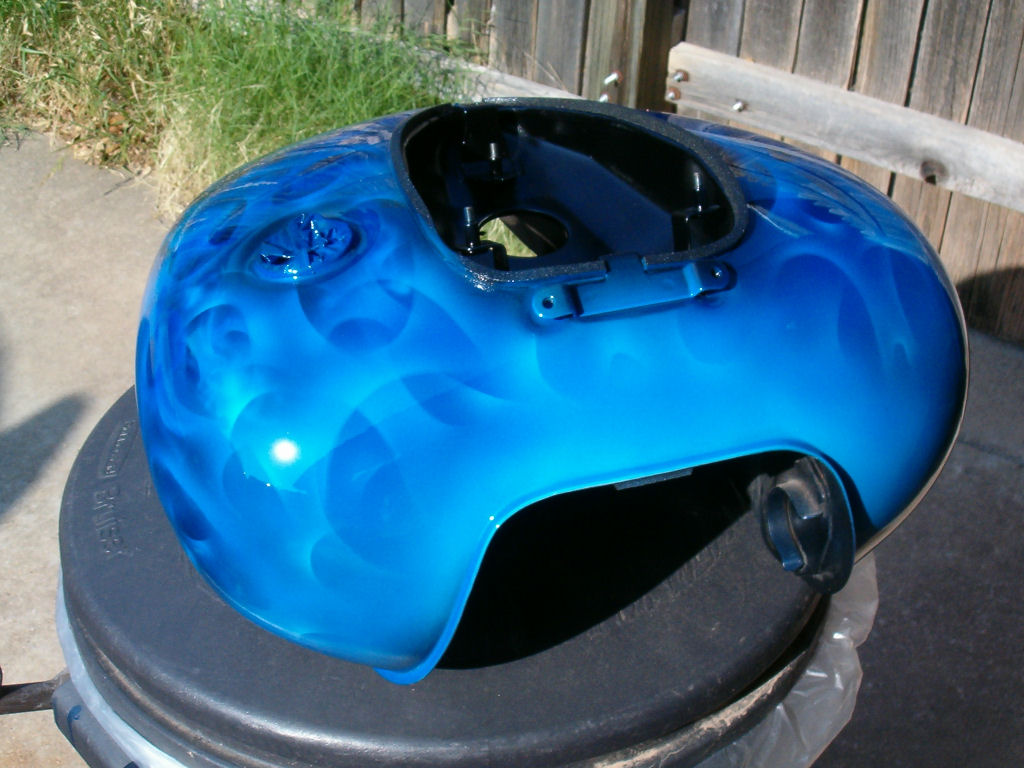
The tank turned out OK after all, although it definitely looks like it belongs with the rear fender. At least we have that much going for us in the consistency department. |
| |
Other side. Yup... consistency, alright. |
| |
I just realized that I really should've
tried to break the flames up a little more towards the back of the tank.
Oh well... too late now.
There will be more pictures coming after the clear-coat dries. |
| |
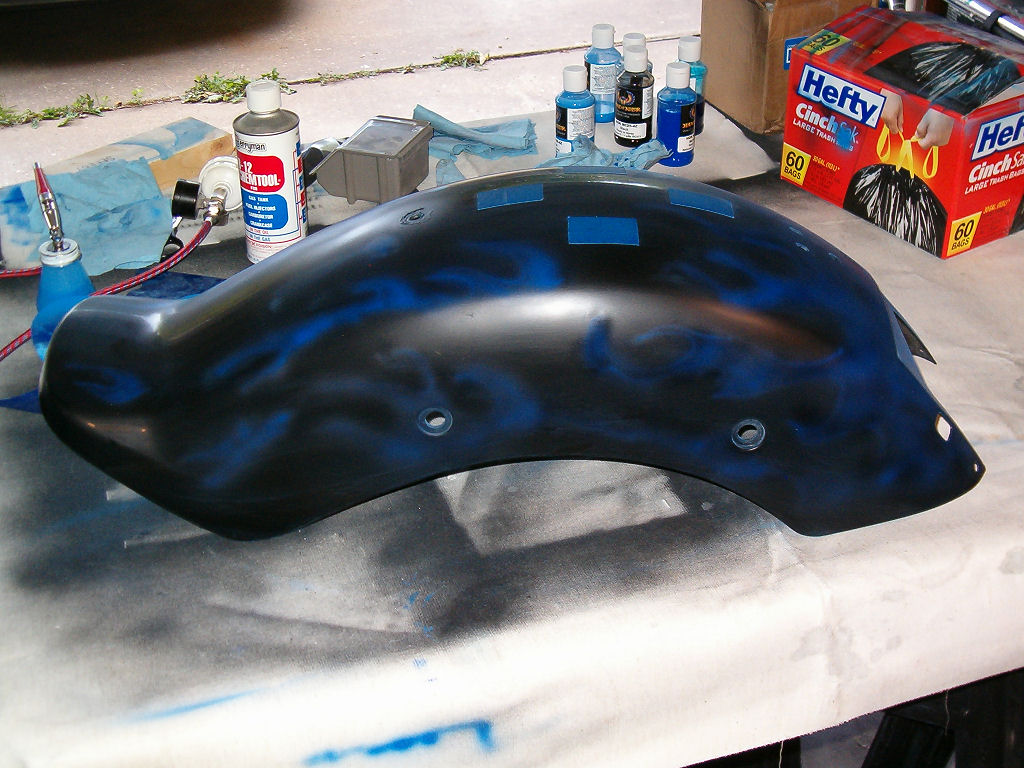
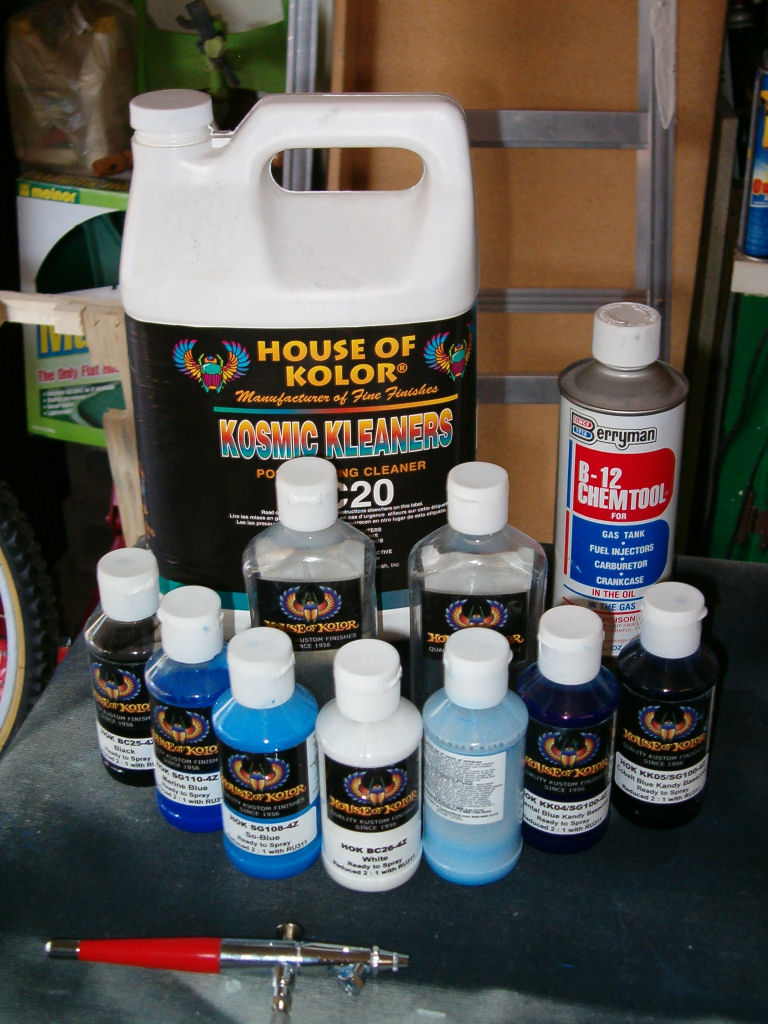
Here's my arsenal of colors and other
products used in this project. Primarily House Of Kolor products,
including: Basecoat Black, Basecoat White, Graphics Marine Blue, Graphics
So-Blue, Cobalt Blue Candy (Shimrin), Oriental Blue Candy (Shimrin), and
a blend of White and So-Blue for the hightlights. I also used HOK
Kosmic Kleaner to wash down the surfaces between the paint layers and used
some actual tack-cloths (not pictured) to wipe off overspray as well.
I also used the Berryman's B-12 ChemTool for cleaning the airbrush and washing
out the airbrush bottles between colors. The airbrush is a Paasche
VL-X double-action internal-mix unit borrowed from my pal Jim (I have GOT
to get one of those things).
Also not pictured is a cool old-school syphon touch-up gun I used to put down the DuPont Centauri Urethane Clear-Coat.
|
| |
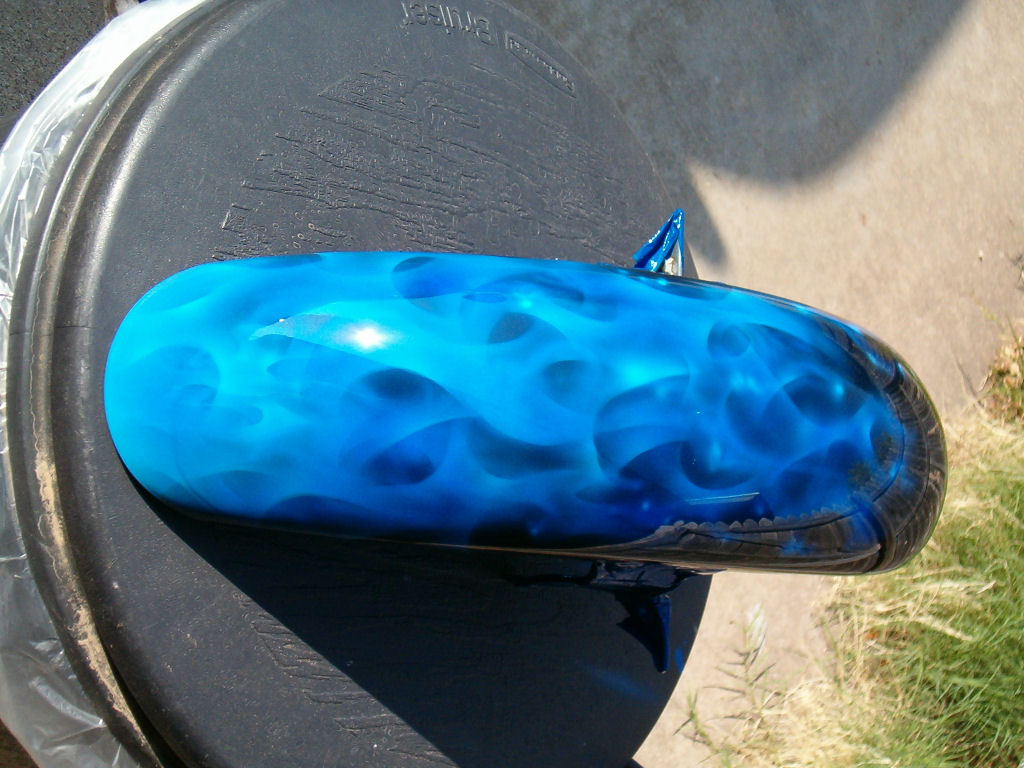
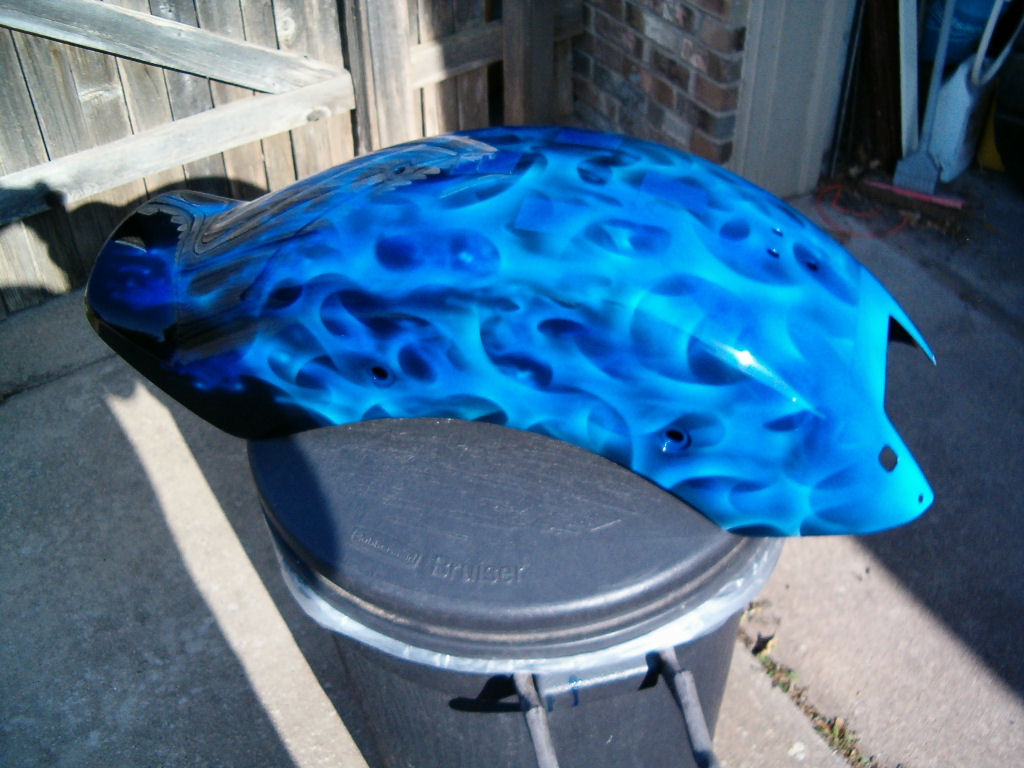
OK - now I have some clear coat on the pieces. This one's still my favorite. And these shots are in the sun. Unfortunately, the camera does them zero justice. Pretty wild how you can even make out my ratty-ass fence in the shine. |
|
|
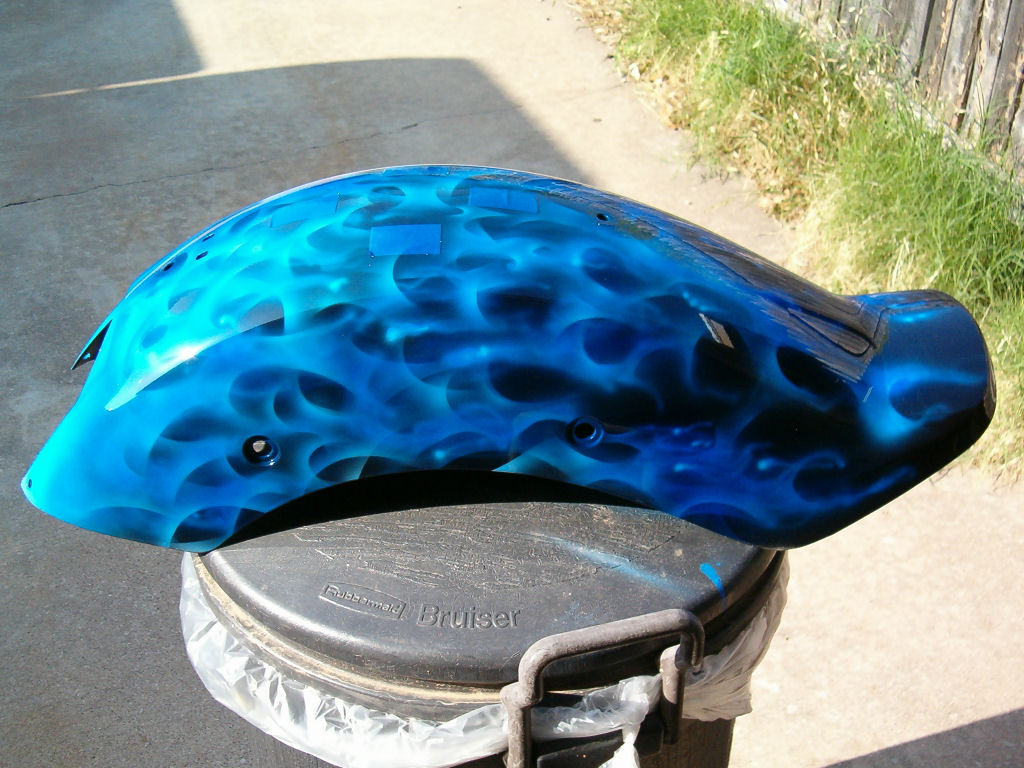
Here's the rear fender with the clear. I wasn't sure if this was going to be bright enough, but once it's out in the sun, it looks a whole lot different. Stupid Auto-Focus on my camera... It usually works... but sometimes - not so much. |
|
|
The other side - and yeah - I think they'll be bright enough. |
| |
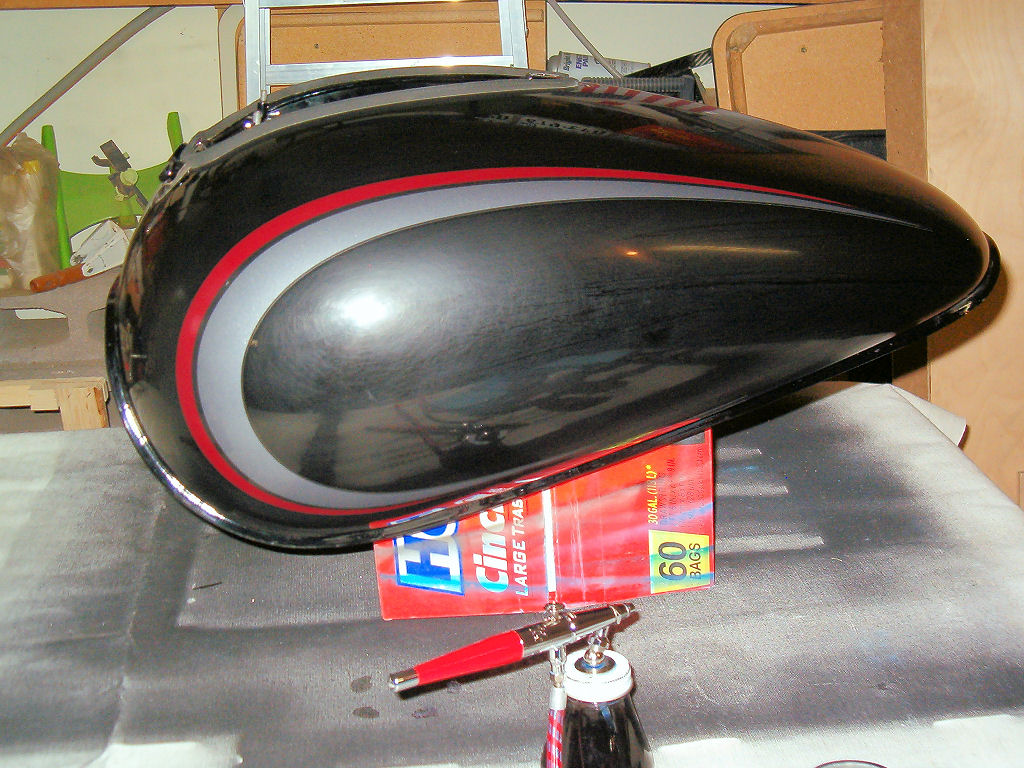
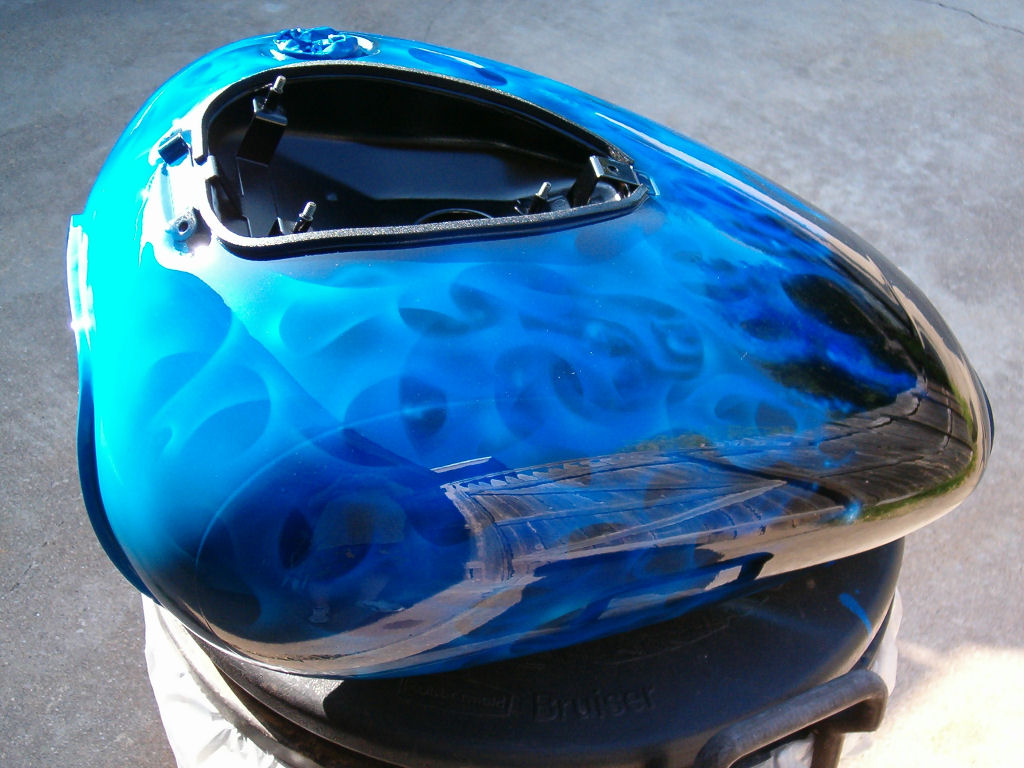
The left side of the tank. You know, I got that clear coat on so deep and clean (except a couple of minor flaws) that I almost don't have to color-sand it... almost. But I'm going to anyway. Hopefully, I'll be able to knock down the edge of the stripes I left in there a little bit. But the odd thing is that sometimes you can see 'em, and looking at the next pictures below - sometimes you can't. |
| |
And here's the right side... sorry for the shadow of my arm. |
| |
Here's one of the front side of the tank. I tried to make it look 'hotter' (as blue flames go) because where the fire is hottest, it's the brightest. Or at least in theory anyway. |
|
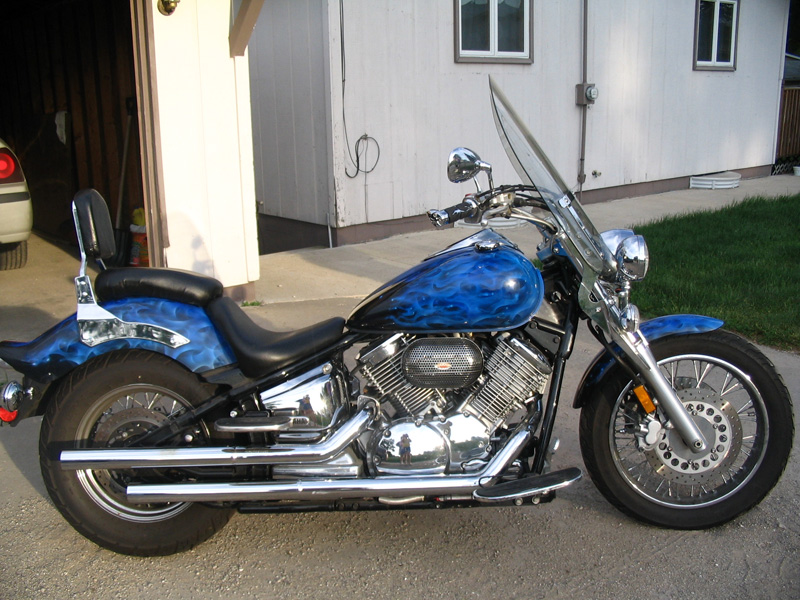
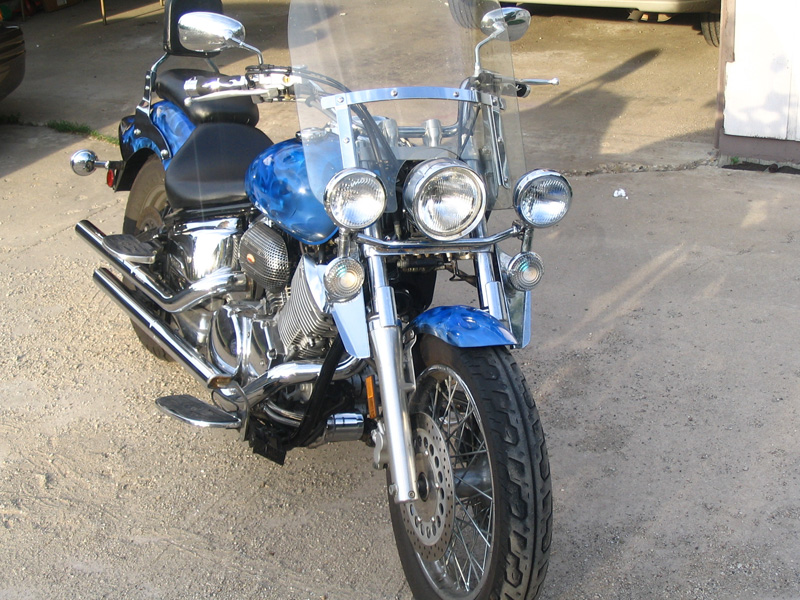
And finally, here's a couple of shots with all the stuff back on the bike. |
|
Turned out pretty decently, I might say. |
|
Other side. |
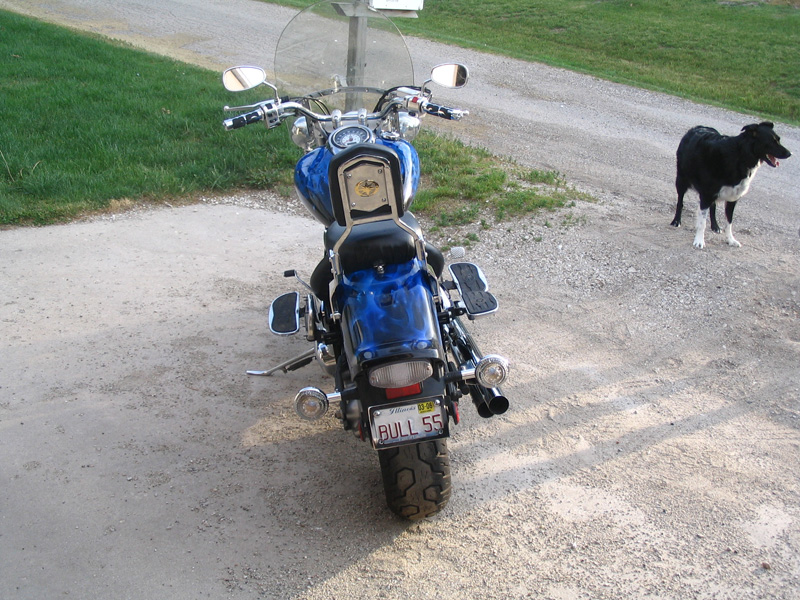
|
And the last shot (so far). |